
Self-hosting is becoming a popular choice for developers and businesses, with over 75% of organizations preferring self-hosted applications for better control, privacy, and cost reduction. Unlike third-party platforms like Heroku or Vercel, self-hosting allows you to run and manage your applications on your own infrastructure.
This is where Coolify comes in. As an open-source, self-hostable platform, Coolify simplifies deploying and managing applications. Whether you are hosting websites, databases, or full-stack applications, it provides an easy-to-use interface while giving you complete control over your resources.
In this guide, we'll walk you through installing Coolify on a BaCloud VPS running Ubuntu 24.04 so you can easily start hosting your projects.
Coolify is a self-hosted Platform-as-a-Service (PaaS) that makes it easy to deploy and manage applications on your own server without requiring deep DevOps expertise. It works as a self-hosted alternative to platforms like Heroku, giving you more control over your deployments without the usual complexity.
With Coolify, you can quickly set up websites, web apps, APIs, and databases with just a few clicks. It supports popular programming languages like Node.js, Python, and PHP and leverages Docker to simplify deployment.
By using Coolify on a BaCloud VPS, you gain greater flexibility, security, and lower operational costs while maintaining a user-friendly interface for managing your infrastructure.
Before getting started, make sure your BaCloud VPS meets the following requirements:
● Ubuntu 24.04 Installed – This guide is specifically for Ubuntu 24.04.
● A registered domain name (optional) – Recommended if you plan to set up HTTPS.
● Sufficient system resources – At least 2GB RAM is recommended for stable performance.
Before installing any software, it's a good practice to update the system packages to ensure both compatibility and security. Run the following command:
|
sudo apt update && sudo apt upgrade -y |
This step ensures that your VPS has the most recent security patches and software versions.
Coolify runs inside Docker containers, so Docker must be installed on your VPS. If you haven’t installed it yet, follow our Docker installation guide for Ubuntu 24.04 before proceeding.
After installing Docker, verify that it is installed correctly by running:
|
docker --version |
![]()
If the command returns a version number like the one in the image above, then Docker is installed correctly and ready for use.
Docker Compose is a tool for simplifying the management of containerized applications. Coolify uses Docker Compose to automatically define and manage all necessary services, so you don’t have to handle multiple Docker commands manually.
Run the following command to install Docker Compose on your system:
|
sudo apt install docker-compose-plugin -y |
Once the installation is complete, check if Docker Compose is installed correctly by running:
|
docker compose version |
![]()
If the command returns a version number like the one above, the installation succeeded.
Now that your server is ready, install Coolify using the official installation script. This command downloads and configures everything Coolify needs, including Docker dependencies if they are not already installed.
Run the following command:
|
curl -fsSL https://cdn.coollabs.io/coolify/install.sh | sudo bash |
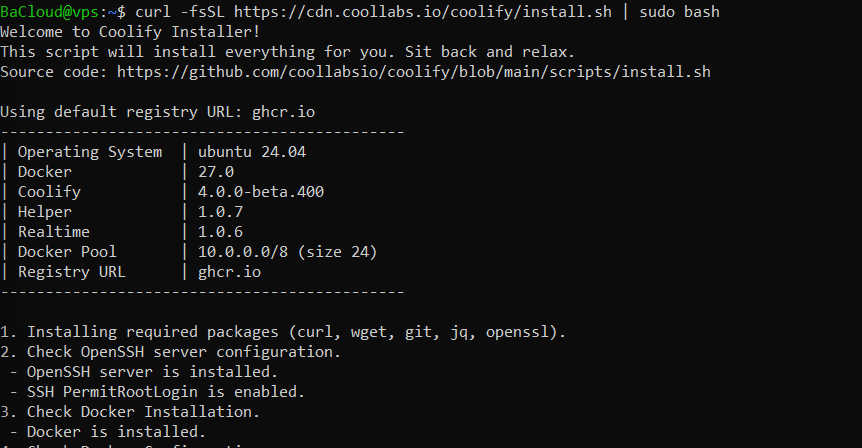
The installation takes about 3 minutes, and while you wait, Coolify throws in some jokes to keep things fun. Once it's done, you'll see a success message confirming that Coolify is installed and ready to go.
The output will look like this:

At this point, Coolify is fully installed.
Now that Coolify is installed, it's time to access the dashboard and set up your environment.
To access Coolify, you need your VPS's primary IP address. You can find this in the BaCloud Client Area - https://www.bacloud.com/en/clientarea
Once you have your IP address, open a web browser and enter:
|
http://your-vps-ip:8000 |
For example, if your VPS IP is 193.168.1.10, head to:
|
http://193.168.1.10:8000 |
At this point, Coolify should load its setup screen. If it doesn’t appear immediately, wait a few minutes and refresh the page.
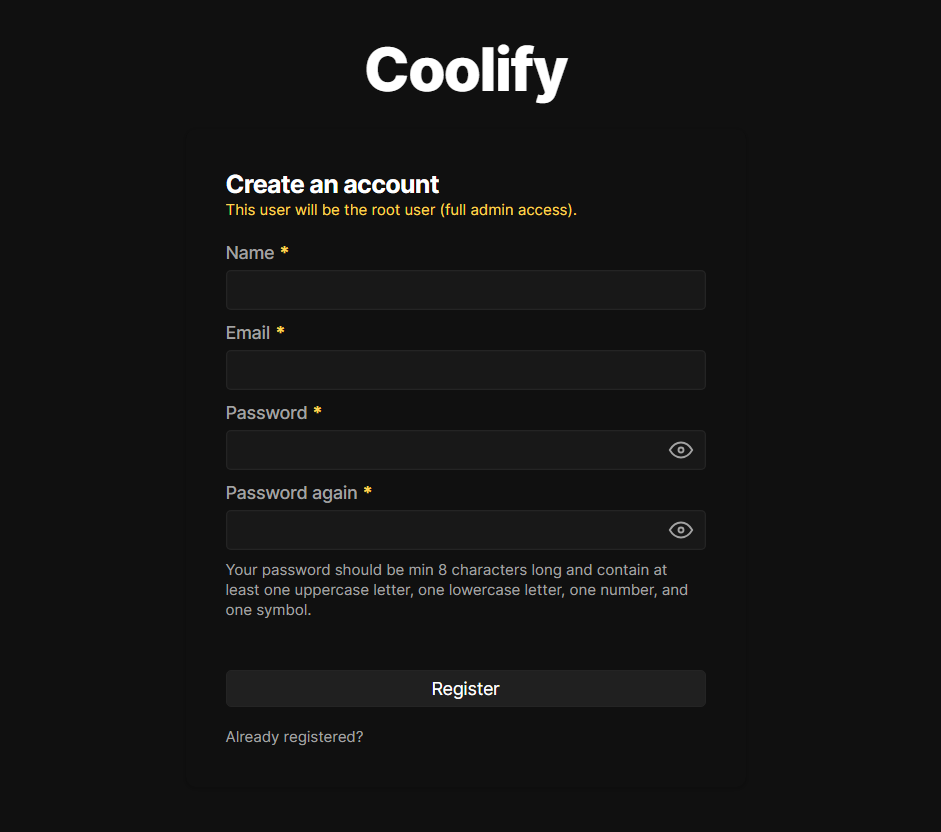
On the first screen, you'll be prompted to create an admin account. This is the account you'll use to manage Coolify.
Once you register your admin account, Coolify will introduce itself with an overview of its features. This screen explains what Coolify is and how it helps manage deployments.
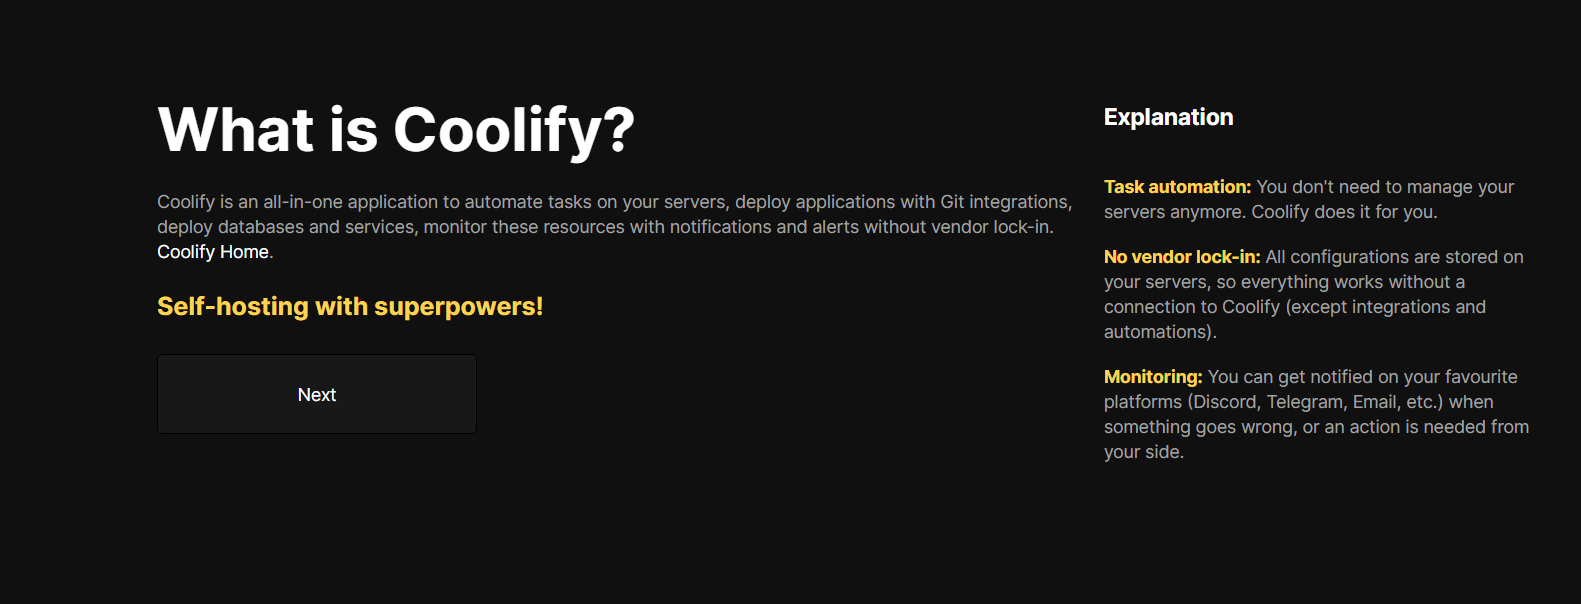
Click Next to continue.
Coolify will ask where you want to deploy your resources. You’ll see two options:
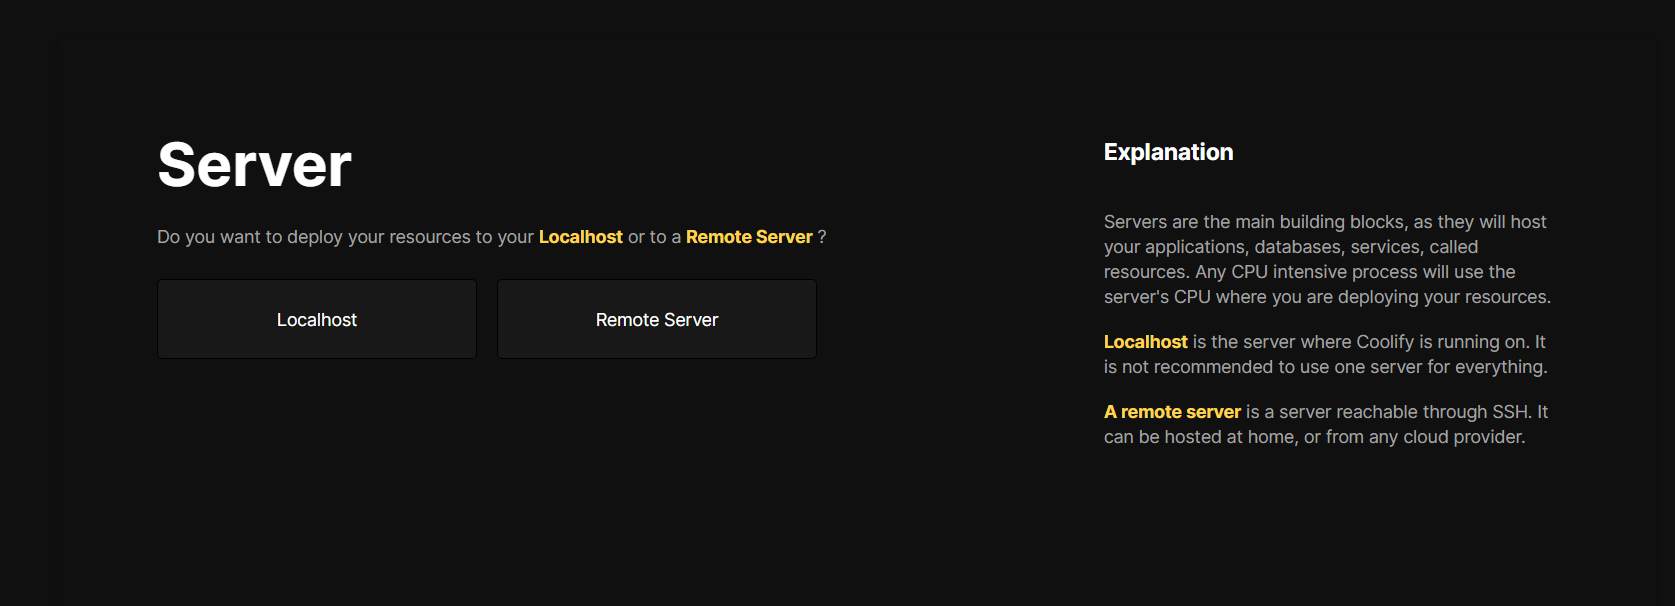
● Localhost – Use this if you want to deploy applications on the same server where Coolify is installed.
● Remote Server – Choose this option if you want to deploy applications to another server via SSH.
Since you're using Coolify on a VPS, you’ll usually want to choose Remote Server for better flexibility
Next, Coolify will ask if you already have an SSH private key:
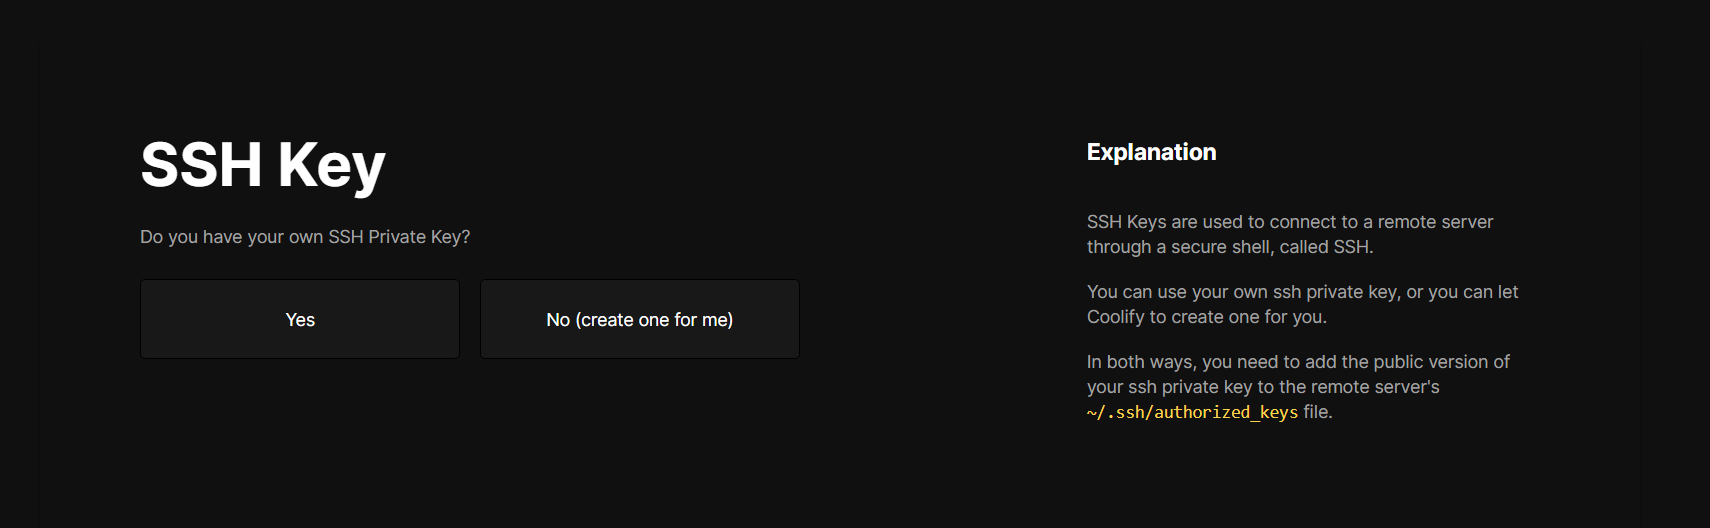
● If Yes, Coolify will use your existing key to connect to remote servers.
● If No, Coolify will generate a new key for you.
If you choose No, Coolify will provide instructions to add the generated public key to your VPS.

To do this follow these steps:
1. Open the authorized_keys file for editing:
|
nano ~/.ssh/authorized_keys |
2. Paste the public key provided by Coolify at the end of the file.
3. Save and exit.
4. Return to Coolify and click Save to continue.
Now that your SSH key is set up, Coolify can connect securely to your VPS. The next step is to create a server, this is where your applications will be deployed.
Let’s go through the setup process step by step.
Coolify will ask you to enter some basic details about your server:
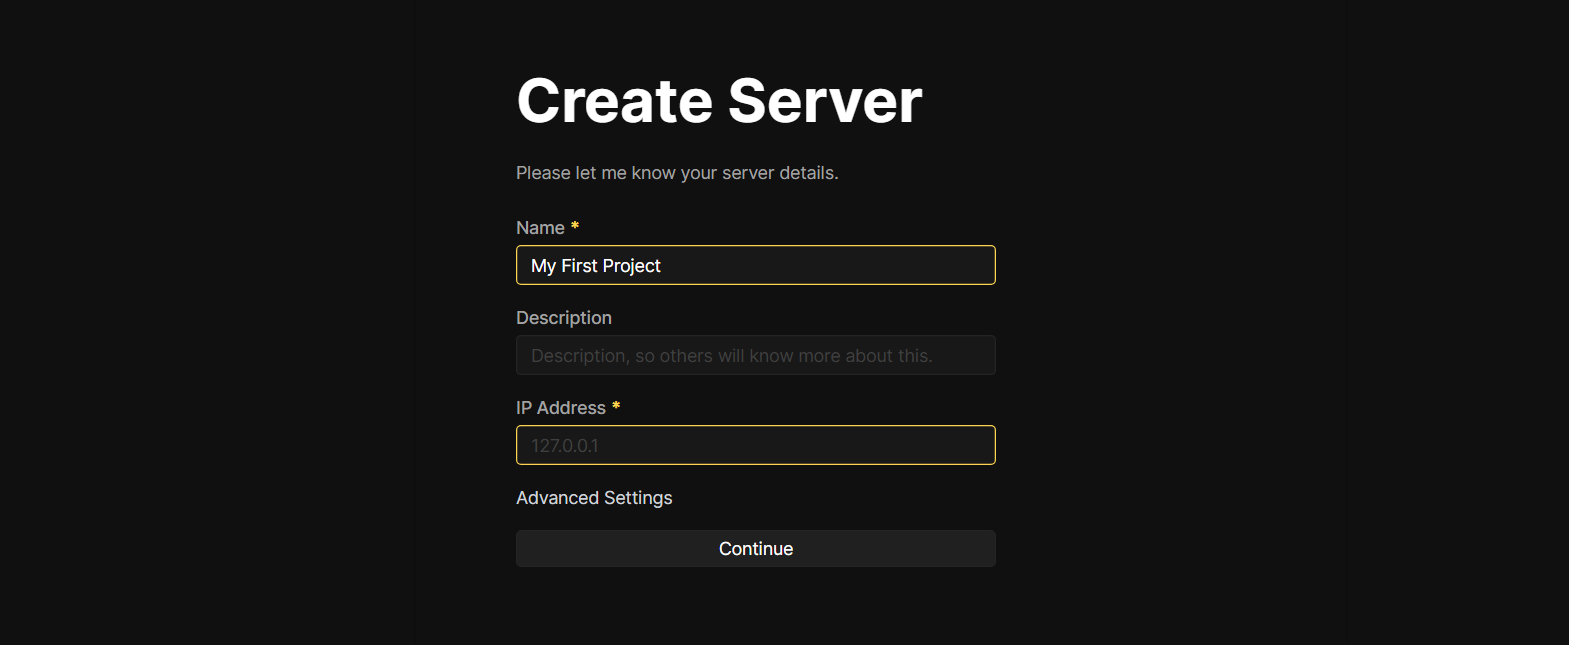
● Server Name – Give your server a name (this is just for identification in Coolify).
● IP Address – Enter your BaCloud VPS’s IP address.
● SSH User – Typically, this is root, unless you’ve set up a different user for SSH access.
Once you’ve filled in these fields, click Continue.
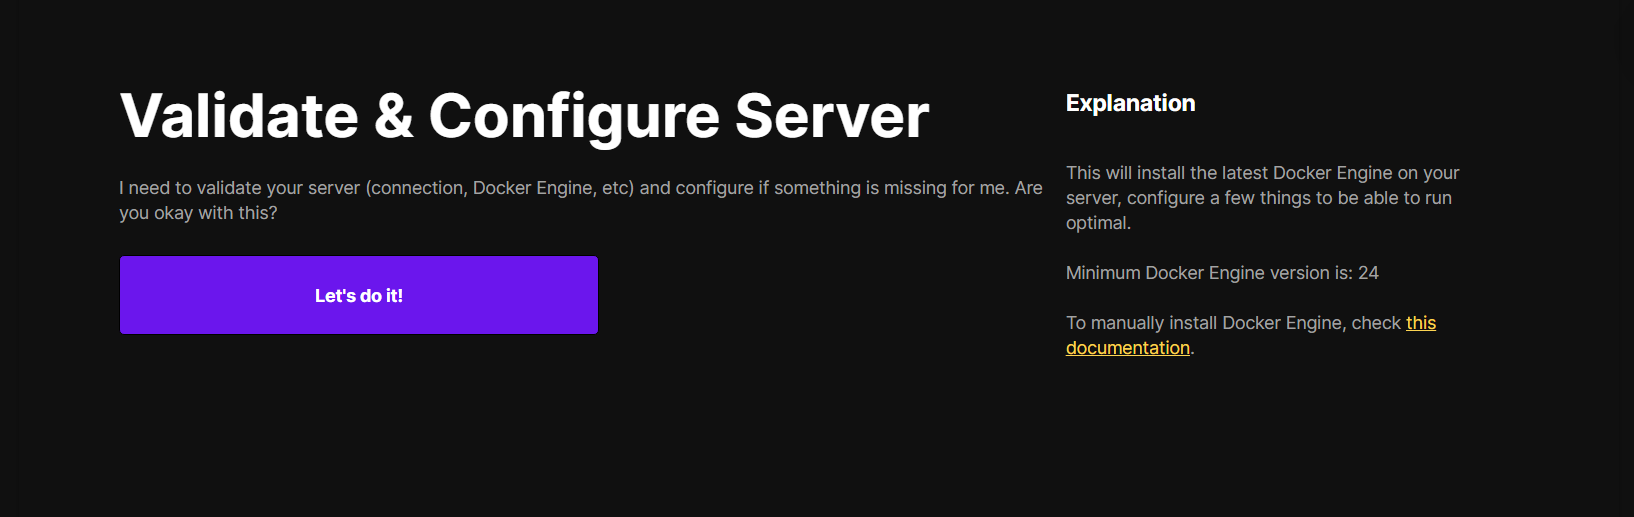
At this stage, Coolify will attempt to connect to your VPS using the SSH credentials you provided. It will automatically check for:
● A working SSH connection
● Required dependencies
● Whether Docker is installed since Coolify relies on it
This validation might take a moment, so just wait while Coolify completes the checks.
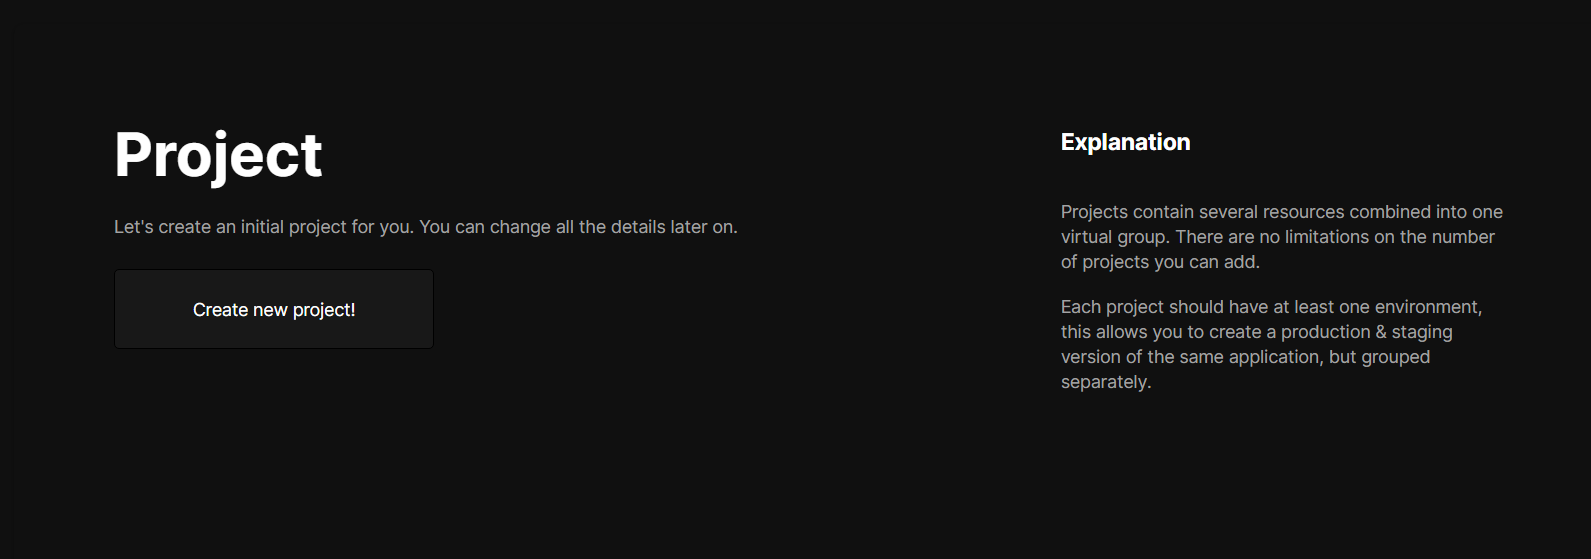
Once the validation is complete, Coolify will prompt you to create an initial project. Simply click Create New Project to proceed.
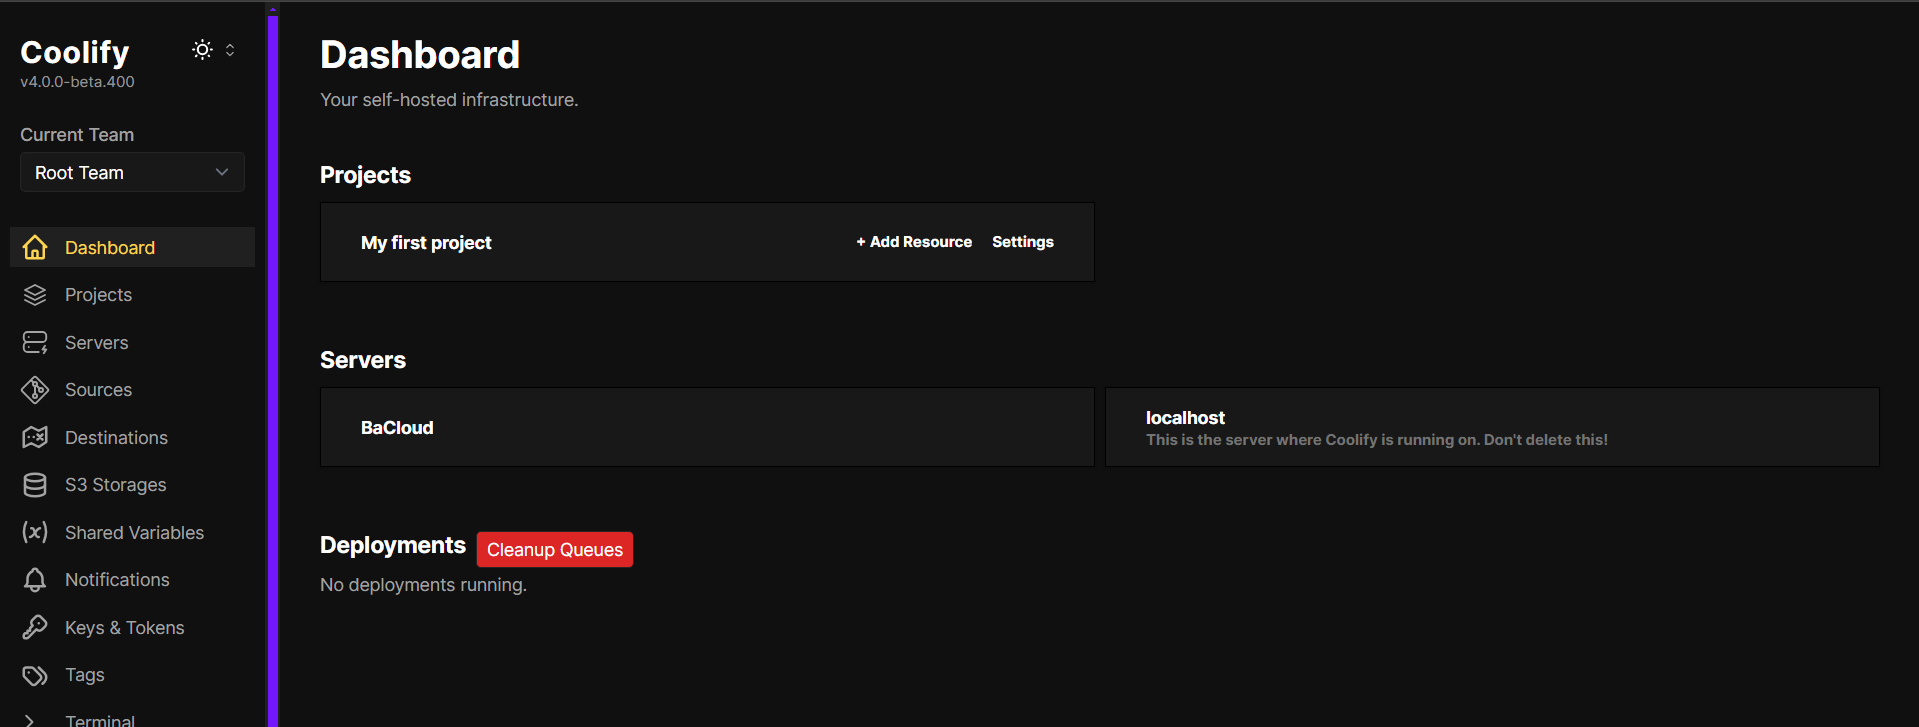
You’ll be taken to the Coolify dashboard (as shown below), where you can start managing deployments.
You can access Coolify via your server’s IP at http://your-vps-ip:8000. However, this method poses security risks, as IP-based access lacks encryption, making your connection vulnerable to attacks. Using a domain provides a more secure and convenient way to access Coolify, as it allows HTTPS to be enabled automatically, ensuring encrypted communication and safer access.
To use your domain with Coolify, update your DNS settings:
1. Log in to your domain registrar (e.g., Namecheap, GoDaddy, Cloudflare).
2. Find the DNS settings for your domain.
3. Create two A records:
○ @ (root domain) - Points your main domain (e.g., example.com) to your server.
○ * (wildcard subdomain) - Allows Coolify to create and use subdomains dynamically (e.g., app.example.com, dashboard.example.com).
4. Wait for DNS propagation (this may take a few minutes to an hour). To check if your domain has propagated, you can use an online tool like whatsmydns.net.
Once your domain is pointing to your server:
1. Open Coolify's settings in your browser (http://your-vps-ip:8000).
2. Go to the "Instance Domain" field in Settings > Configuration.
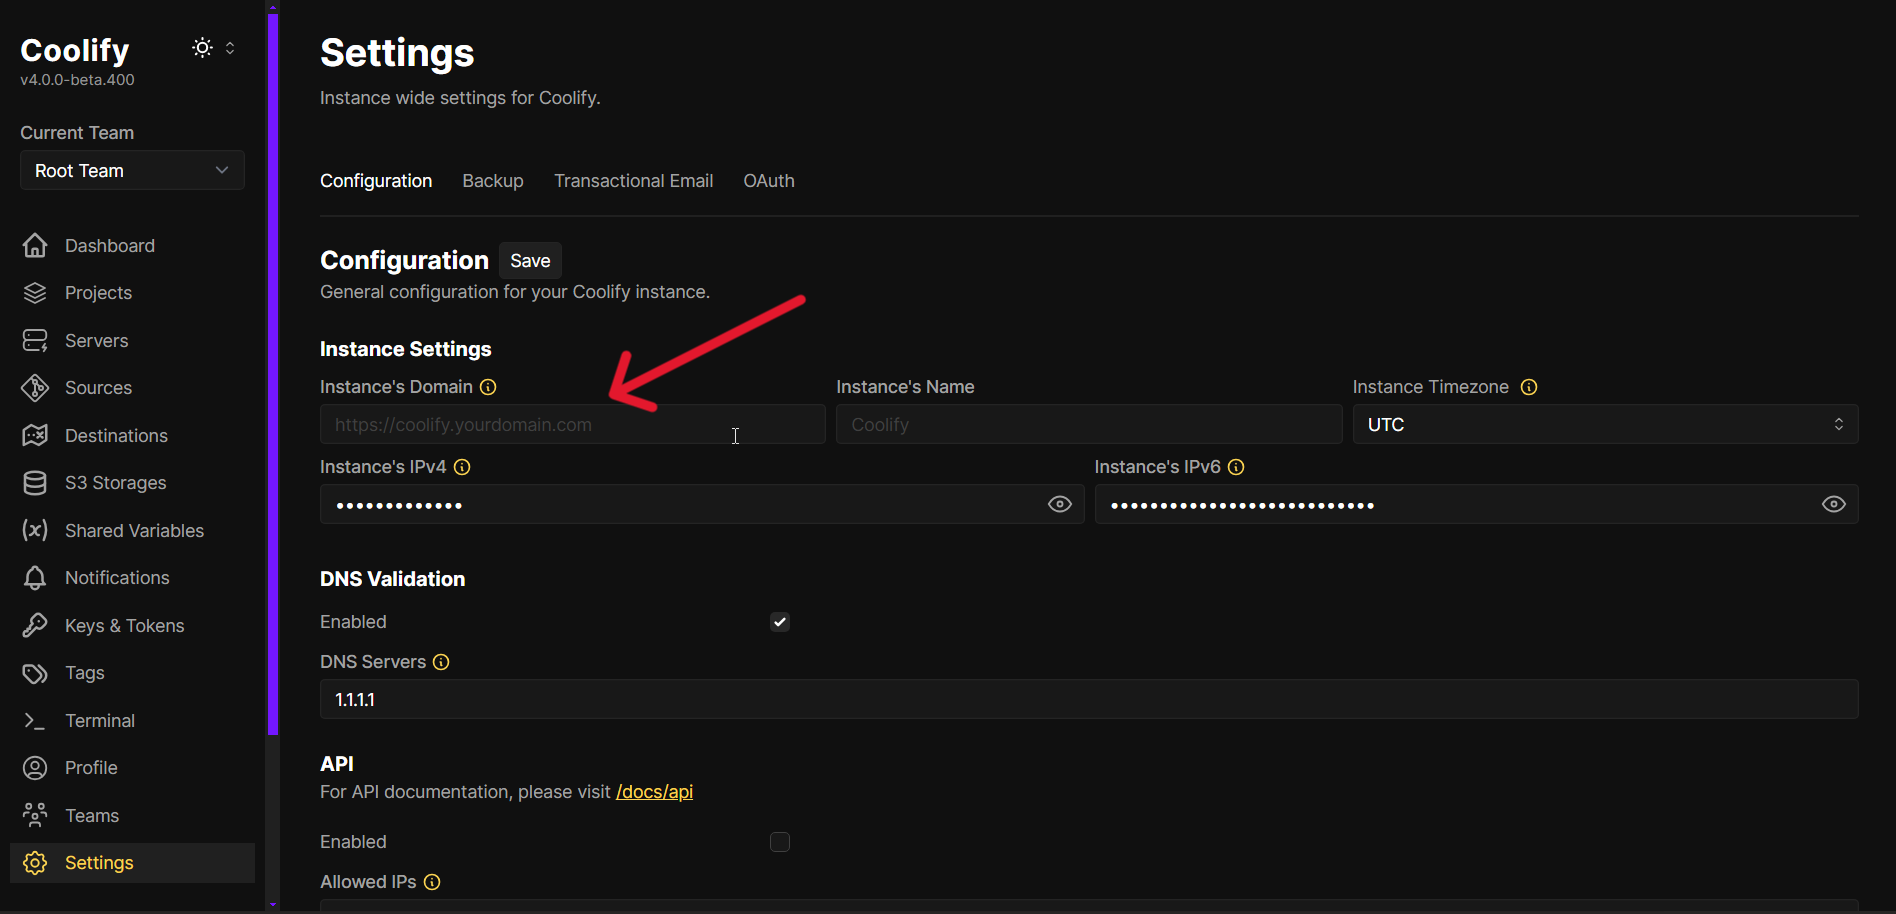
3. Enter your domain name (e.g., coolify.example.com).
4. Save the changes—Coolify will automatically handle SSL setup via Let's Encrypt.
Once setup is complete, you can access Coolify securely at: https://coolify.example.com.
If it doesn’t load immediately, refresh the page or wait a few minutes for DNS and SSL configuration to finalize.
Setting up Coolify on an Ubuntu 24.04 VPS is a simple and effective way to easily manage your applications. This self-hosted deployment platform gives you greater control and flexibility over your infrastructure.
For more in-depth tutorials, visit the BaCloud Blog, where you’ll find helpful guides.