By default, newly created users lack access to Remote Desktop Services on your Windows Server. It is important to guarantee connectivity for other users. However, it’s not uncommon to forget to grant access, leading to connectivity issues. This tutorial provides instructions on granting access to Remote Desktop Services and creating new user accounts.
Learn how to connect to the server here.
Creating a new user
After successfully connecting to your server, follow these steps to create a new user:
- Open the search bar and type Computer Management - click on the app.

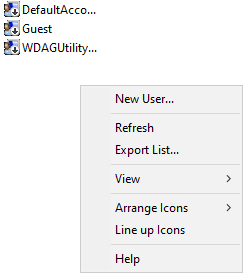
- A window will open with many options on the left sidebar. Select Local Users and Groups, after that double click on Users catalog icon. To make a new user right-click below users on the white background and select New User…

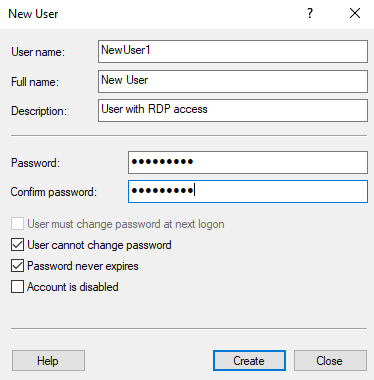
- In the New User window input the necessary information about the user:
- User name: name used for authentication into the server
- Full name: full name of a user or a person, that will be using this account
- Description: short description of the account - After filling out these fields do not forget to set the password and if needed check that the Password never expires is active. Finally, click Create to complete user creation. (Note: Refer to the image below for illustrative sample data)

If you did these steps correctly you have successfully added a new user to your server!
Granting access to Remote Desktop Services
So, now that you have successfully generated a new user it is also important to not forget to grant access to Remote Desktop Services such as RDP, but rest assured, the process is straightforward as long as you follow these steps:
- In the same Computer Management app, find your user that you need to grant privileges to and right-click it & select the Properties
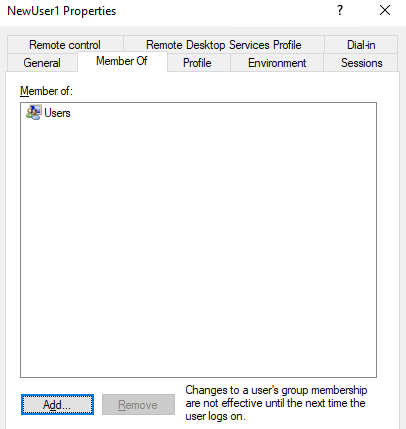
- Another window will open showing information about the user account, select the Member Of tab to see what current privileges it has:

- As we can see it does not have any group policies for Remote Desktop, to add privileges we have to give membership to them. We can do that by clicking Add… on the bottom left of the window.
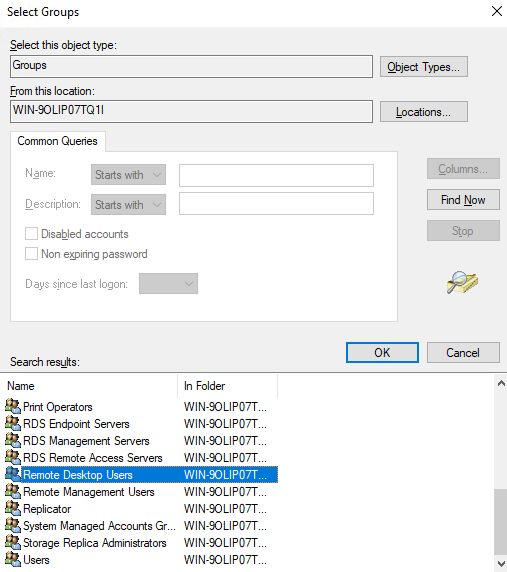
- A third window will open, from here you have to do these things in order:
- Press Advanced
- In the new window press Find Now
- On the bottom of this window it will have returned Search results, scroll down to find Remote Desktop Users group.
- To add your user to this group double-click this option, press OK then Apply and OK again and that’s it!
We have successfully granted Remote Desktop access for the new user!
